1 Overview
The Data Extraction Tool allows us to import Payroll files into Journal Batches. This manual describes the process of installation and configuration of the Data Extraction Tool, to allow importing Payroll files into Journal Batches.
2 Installation
The installation for the Data Extraction Tool will be supplied by Asamco.
Please download the installation and run the installation please. Everything in the setup can be left on default values.
3 Configuration
This chapter will give step by step instruction in how to register and configure the Data Extraction Tool.
3.1 Registration
- Run the Data Extraction Tool as Administrator.
- A window will open where the Tool can be registered on the Asamco Server.
- Enter the location name here. (For example: “Camelsa”).
- The password for the Tool will be provided through Asamco.
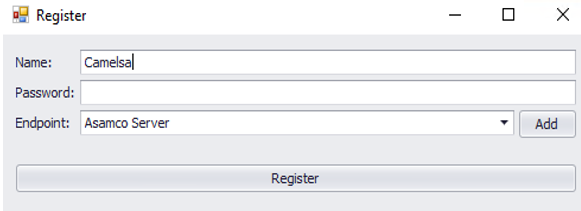
- After everything is filled in click the “Register” button.
3.2 Configuration
When the tool is registered all the configuration needs to be done. This chapter will give step by step instructions in how to configure the Tool for Payroll Tasks.
3.2.1 Settings
3.2.1.1 Payroll Enabled setting
- When the tool is registered an window will be shown with all the configured tasks. On first run these are always empty.
- To enable Payroll Tasks and configure Mailing please go to the “Settings” tab and click on the “Global Settings” button.
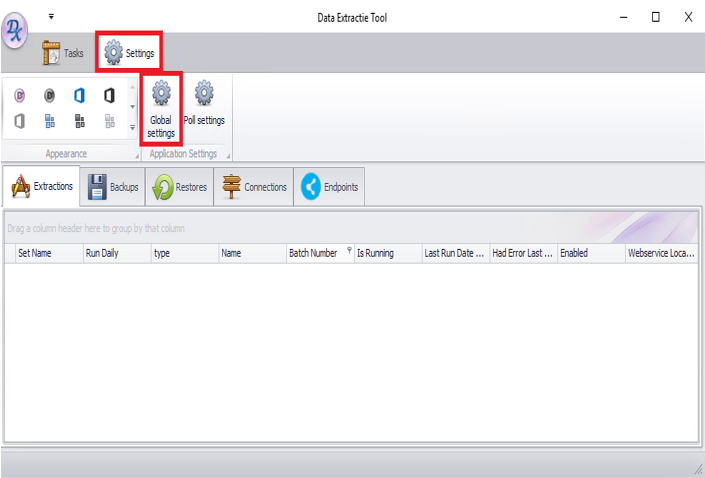
- The newly opened window will show all the configurable settings in the Data Extraction Tool.
- Check the “Payroll Enabled” checkbox, to enable Payroll Tasks.
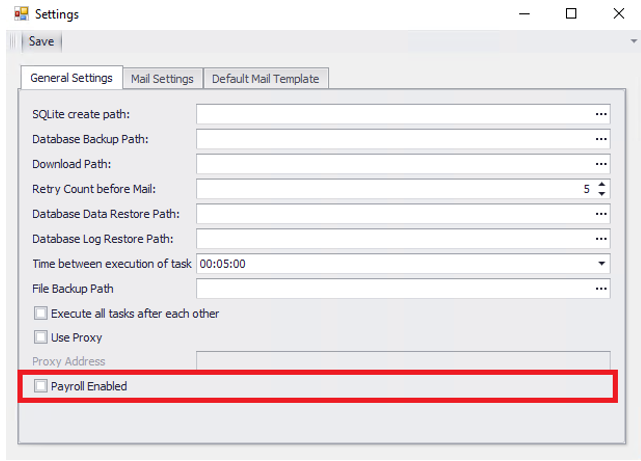
- Please switch to the “Mail Settings” tab to configure the mail.
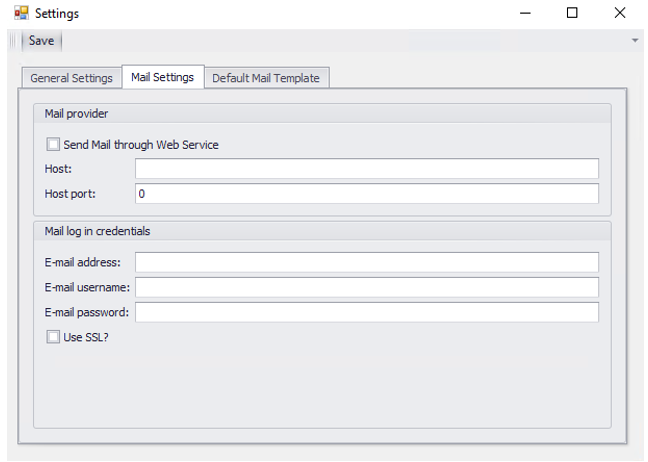
3.2.1.2 Mail Settings
In this chapter we will configure the settings to send an email after completion of the tasks.
- The following fields should be entered:
- Host - The SMTP host.
- Port – The SMTP port.
- Email Address – The email address from which the email are send.
- Email Username – The username of the account on the SMTP server.
- Email Password – The password of the account on the SMTP server.
- In case the credentials are unknown to you. Please send an email to support@asamco.com.
- Please switch to the “Default Mail Template” tab to configure the Default Mail Template.
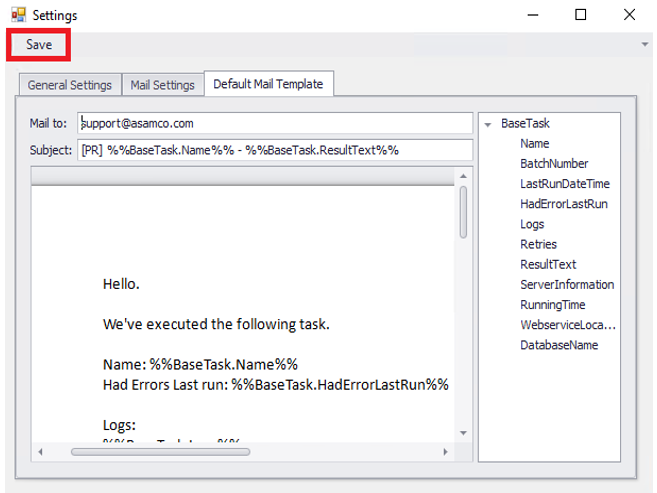
3.2.1.3 Default Mail Template
In this chapter we will configure the Default Mail Template used when creating a new task.
- The following fields should be entered:
- Mail to – To recipient of the email that is send after completion.
- Subject – The subject line of the email.
- Body – This is the body of the email.
- Please find below example values that can be entered here:
- support@asamco.com
- [PR] %%BaseTask.Name%% - %%BaseTask.ResultText%%
Hello. We've executed the following task. Name: %%BaseTask.Name%% Had Errors Last run: %%BaseTask.HadErrorLastRun%% Logs: %%BaseTask.Logs%% Kind Regards, The Asamco Team |
After entering every field that is required click on the “Save” button.
3.2.2 Configuring Payroll Tasks
In this chapter we will configure a new Payroll Tasks.
- When the tool all the required settings are configured, close the settings window please.
- To create a new Payroll Tasks please go to the “Tasks” tab and click on the “New Payroll Task” button.
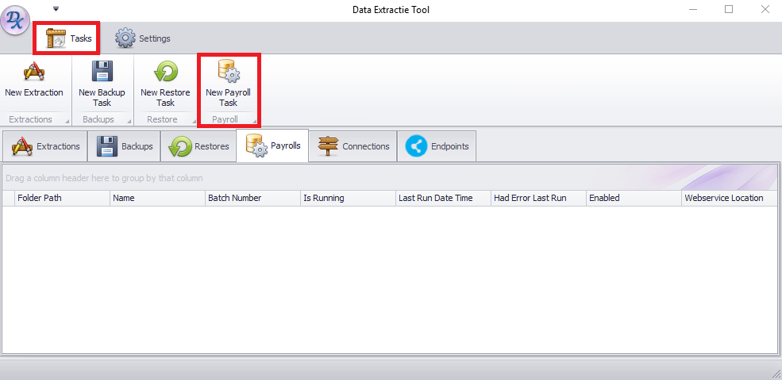
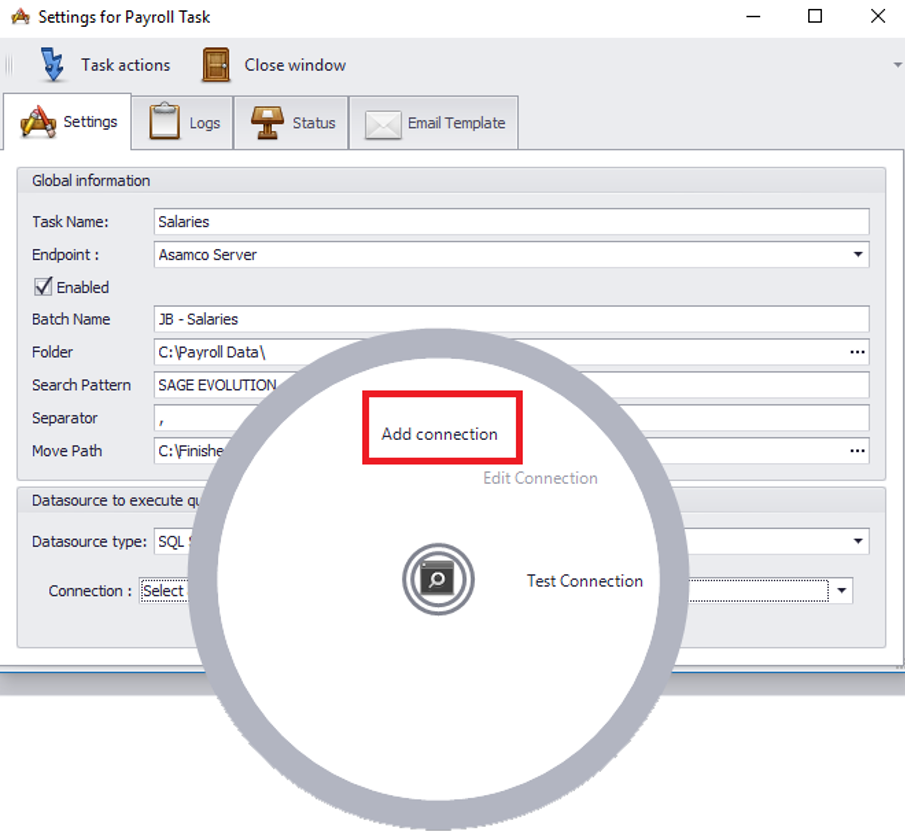
- The newly opened window will show all the configurable settings for one Payroll Task.
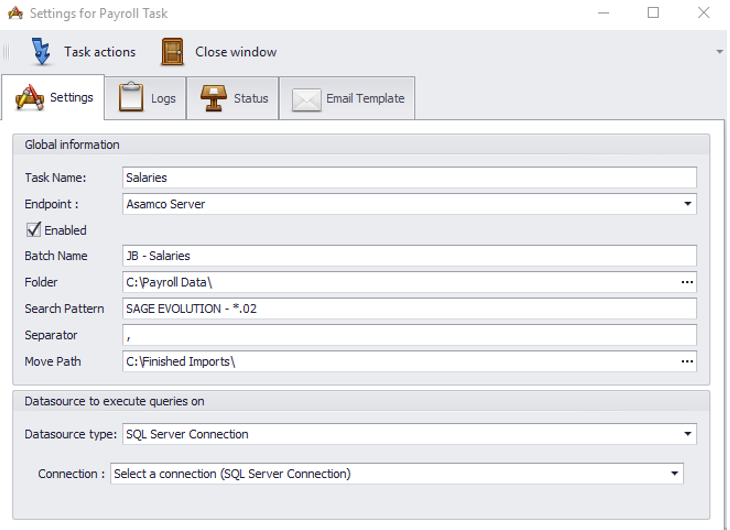
3.2.2.1 Payroll Settings
In this chapter we will configure the settings needed for the Payroll Task.
- The following fields should be entered:
- Task Name – The name of the task. This is your own choice.
- Endpoint – The web service to use. Please select “Asamco Server” here.
- Enabled – Determines if the task is enabled. Leave this to “checked” else the task would not be executed.
- Batch Name – The description of the Journal Batch to import the Payroll data into.
- Folder – The folder where the files are located that should be imported.
- Search Pattern - The pattern used to search for files. This can be only one filename. The following wildcards are supported:
i. Use * (asterisk) for: Zero or more characters in that position.
ii. Use ? (question mark) for: Zero or one character in that position.
- Separator – The separator used in the files to import.
- Move Path – The location to move the files to after importing is finished.
- Please find below some example values:
- “Salaries”
- “Asamco Server”
- “Checked”
- “JB - Salaries”
- “C:\Payroll Data\”
- “SAGE EVOLUTION - *.02”
- “,”
- “C:\Finished Imports\”
3.2.2.2 Data source settings
In this chapter we will configure the data source settings needed for the Payroll Task.
- When all the settings of the Payroll Task are entered, the data source to add the Journal Batches to needs to be added.
- Right click on the “Select a connection (SQL Server Connection)” and click on “Add Connection.
- A new window is opened where the server and credentials of the SQL Server Instance and Database can be filled in.
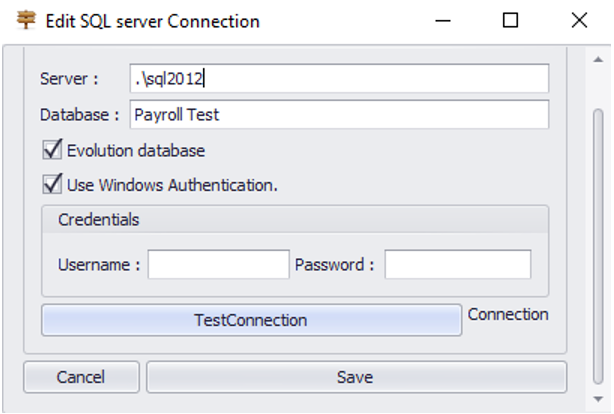
- The following fields must be entered:
- Server – The SQL Server name and instance separated by a backslash “\’”.
- Database – The database name to insert the data into.
- Evolution Database – Determines if the database is an Evolution Database. This can be left to default (“checked”).
- Use Windows Authentication – Determines if Windows Authentication should be used to access the database.
- Username – The username to use to log in to the database. This is only required when Use Windows Authentication is disabled.
- Password – The password to use to log in to the database. This is only required when Use Windows Authentication is disabled.
- Please find below some example values:
- “.\sql2012”.
- “Payroll Test”.
- “Checked”.
- “Checked”,
- Empty
- Empty
- When you have filled in the required fields, the connection can be tested by clicking on the “Test Connection” button.
- If the connection fails an error message will be shown with the exact error. When the error message is unclear to you please contact support@asamco.com for help with this.
- After a successful test the “Save” button can be clicked to save the connection. It will automatically be selected in the previous window.
3.2.2.3 Save and test the Payroll Task
- The last thing required to save the Payroll task is to click on the “Save Payroll Task” button.
- This button can be found on the “Task Actions” button and then the “Save Payroll Task” button.
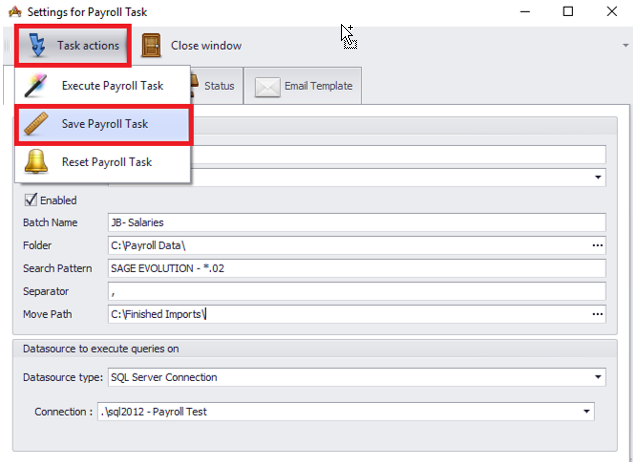
- A message will be shown if the task is successfully saved. If some fields are not filled in correctly an error message will be displayed.
- After the successful save, the window can be closed by clicking on the “Close window” button.
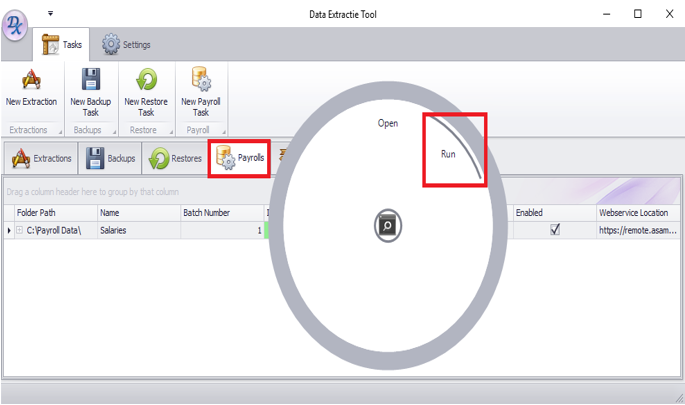
- Now the Payroll Task needs to be tested. In the window with all configured tasks, switch to the “Payrolls” tab.
- A grid will be shown with the recently configured task. Right click on this and click on “Run”. By doing this the task will run once, all the files found will be imported and after completing the full import these will be moved to the specified Move Path.
- If any errors occurred that you are not able to solve, please contact support@asamco.com.
3.3 Scheduling
In this chapter the Data Extraction Tool will be configured to run all the Payroll Tasks every day.
3.3.1 General
- If the Data Extraction Tool is still open, please close this.
- To schedule the tasks, Windows Task Scheduler is used.
- To open Windows Task Scheduler use the following steps:
- Open the Start Menu.
- Search for “Task Scheduler”
- When the Task Scheduler has been opened, create a new task by clicking on the “Create Task” button.
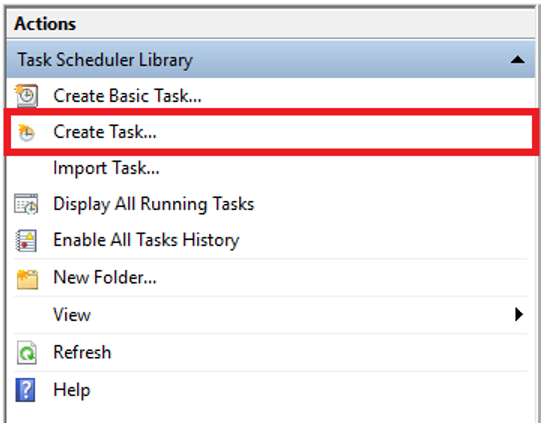
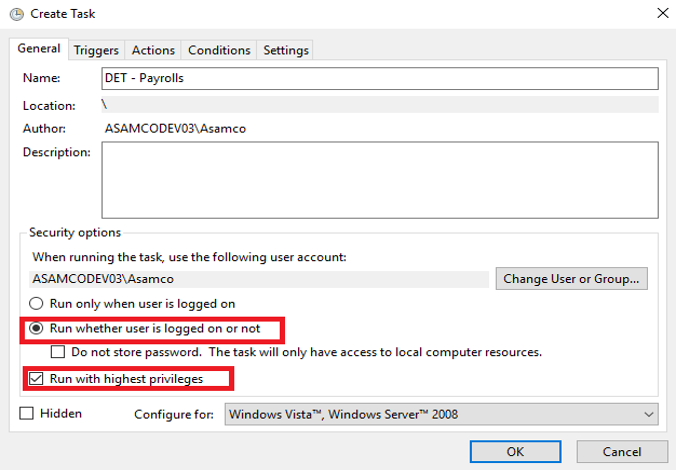
- A new window will be shown with the configuration for the Task Scheduler
- Enter the following name: “DET – Payrolls”.
- Select the option: “Run whether user is logged on or not”.
- Where this option is located differs between Windows Versions.
- Also select the option: “Run with highest privileges”.
3.3.2 Trigger
- Switch to the next tab “Triggers”. And click on the “New” button here.
- Select the option: “Daily” and change the start time to e.g. 23:00 (11:00 PM).
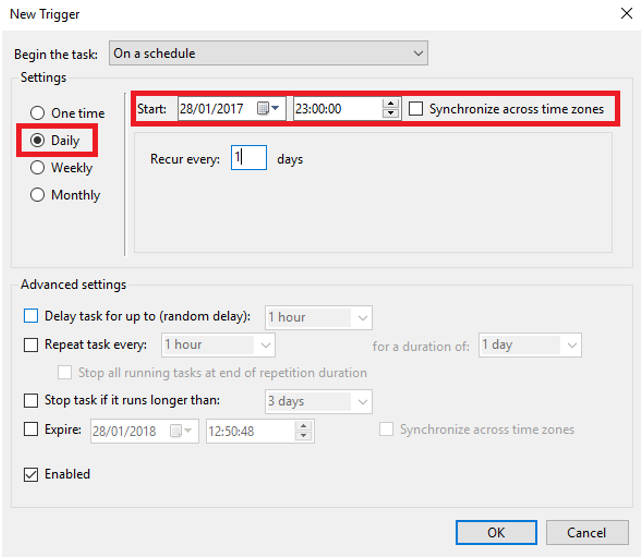
- After filling in these values click on the “OK” button.
3.3.3 Actions
- Switch to the next tab “Actions”. And click on the “New” button here.
- The action needs to be: “Start a program”.
- Click on the “Browse” button to navigate to the installation location of the Data Extraction Tool and select “DataExtractionTool.exe”. The default is: "C:\Program Files\Asamco\Data Extraction Tool\DataExtractionTool.exe".
- In the add arguments field enter: “Payroll All”
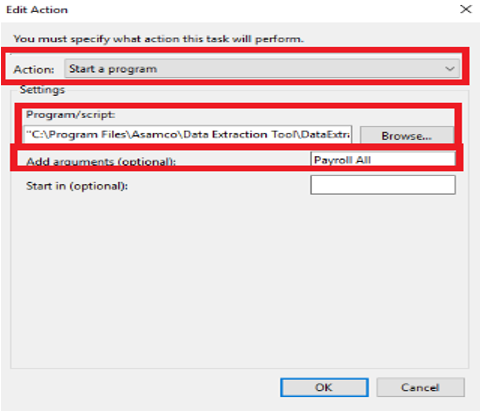
- After filling in all the fields click on the “OK “button.
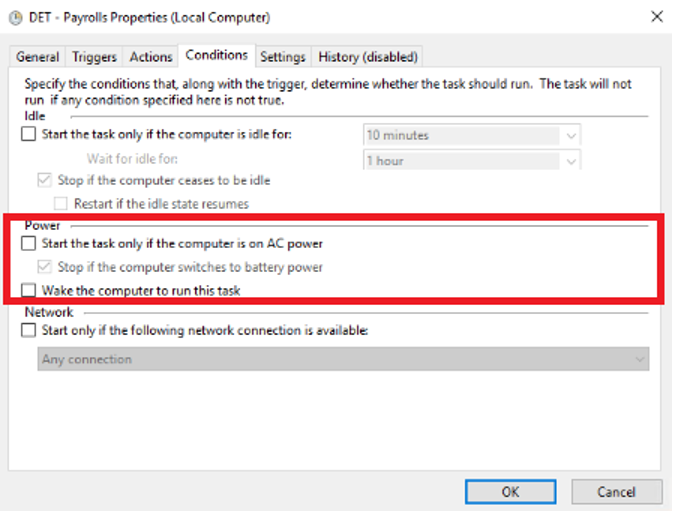
3.3.4 Conditions
- Switch to the next tab “Conditions”.
- Disable the checkbox next to “Start the task only if the computer is on AC Power”.
3.3.5 Settings
- Switch to the next tab “Settings”.
- Enable the following fields:
- “Allow task to be run on demand”.
- “Run task as soon as possible after a scheduled start is missed”
- “If the task fails, restart every: 15 minutes”
- Attempt to restart up to: 3 times.
- “Stop the task if it runs longer than 3 days”.
- “If the running task does not end when request, force it to stop”.
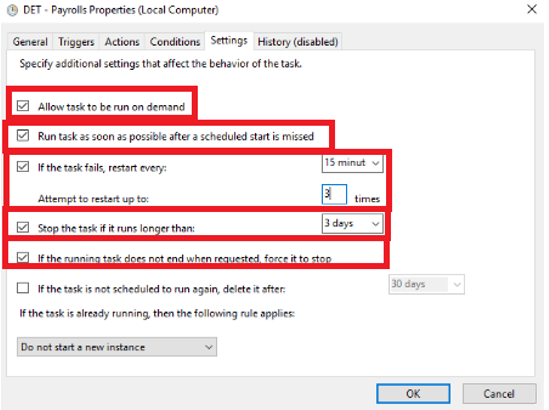
- After enabling these fields, click the “OK” button to save the scheduled task.
- Now the DET has been scheduled to run every day.