Creating a payment batch
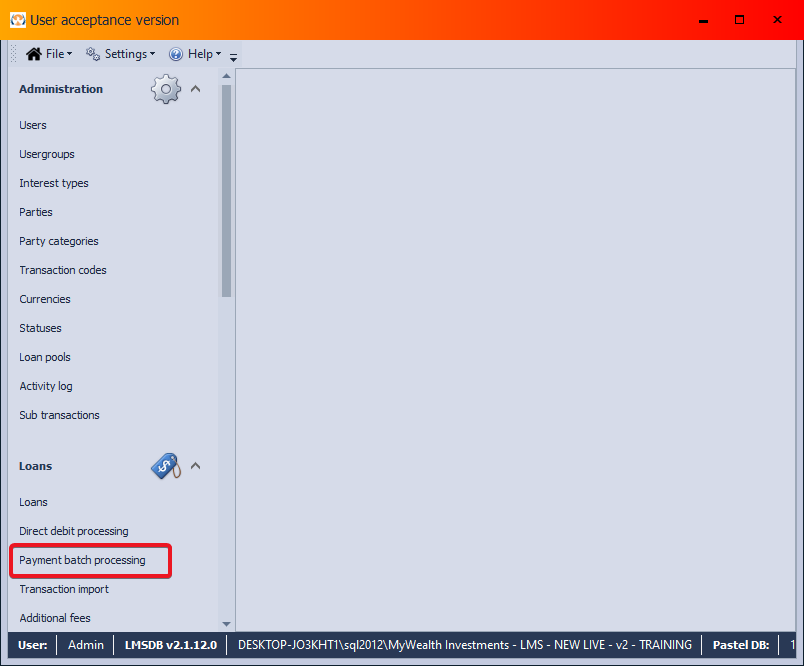
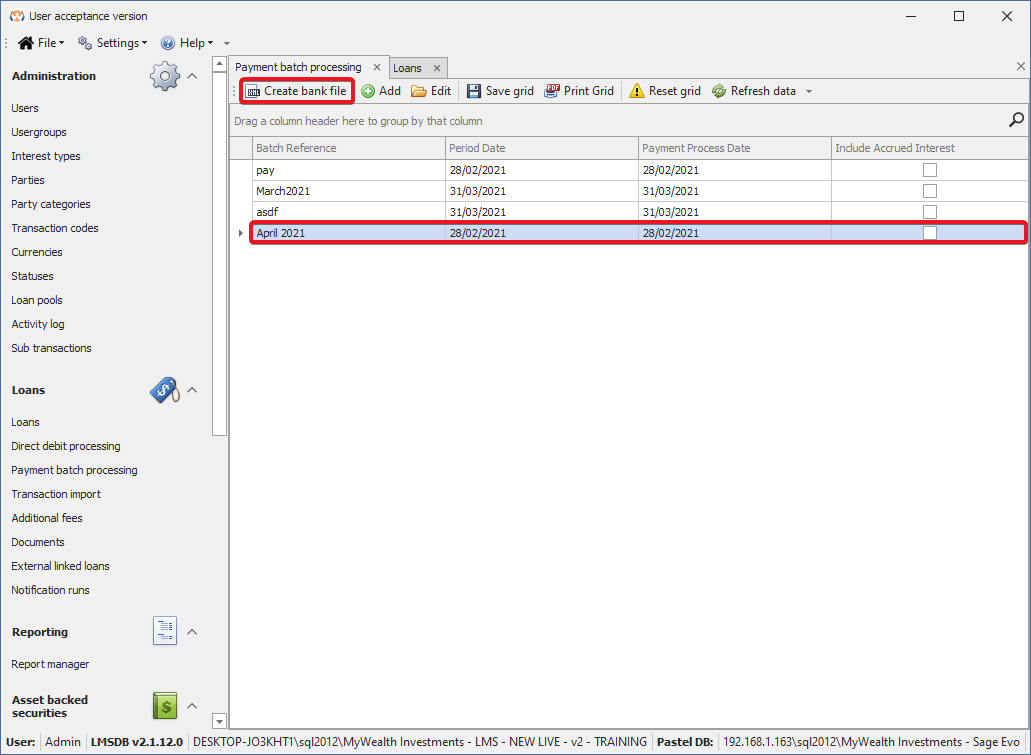
Open the application and log in. After logging in you will see the following default window. The payment batch menu can be accessed, using the “Payment batch processing” button on the left menu tree.
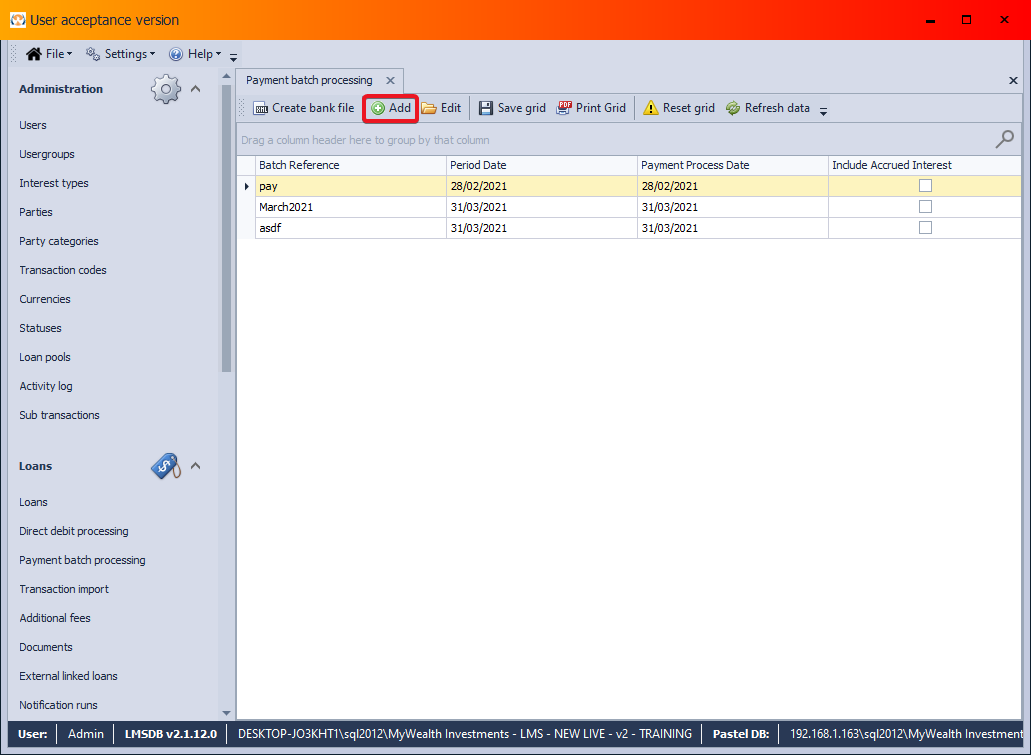
This will open the following tab, containing a list of all currently existent payment batches in the according database. To create a new payment batch, click on the “Add” button at the top of the window.
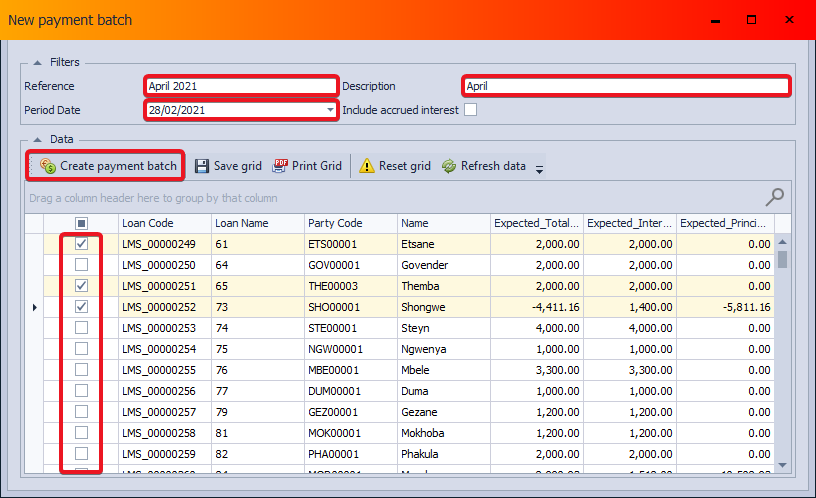
This will, accordingly, lead you to the following window. You are required to fill in the reference, description and period date for the batch. Loans can be added to the batch by using the checkboxes in front of each loan. After, the batch can be saved, using the “Create payment batch” button.
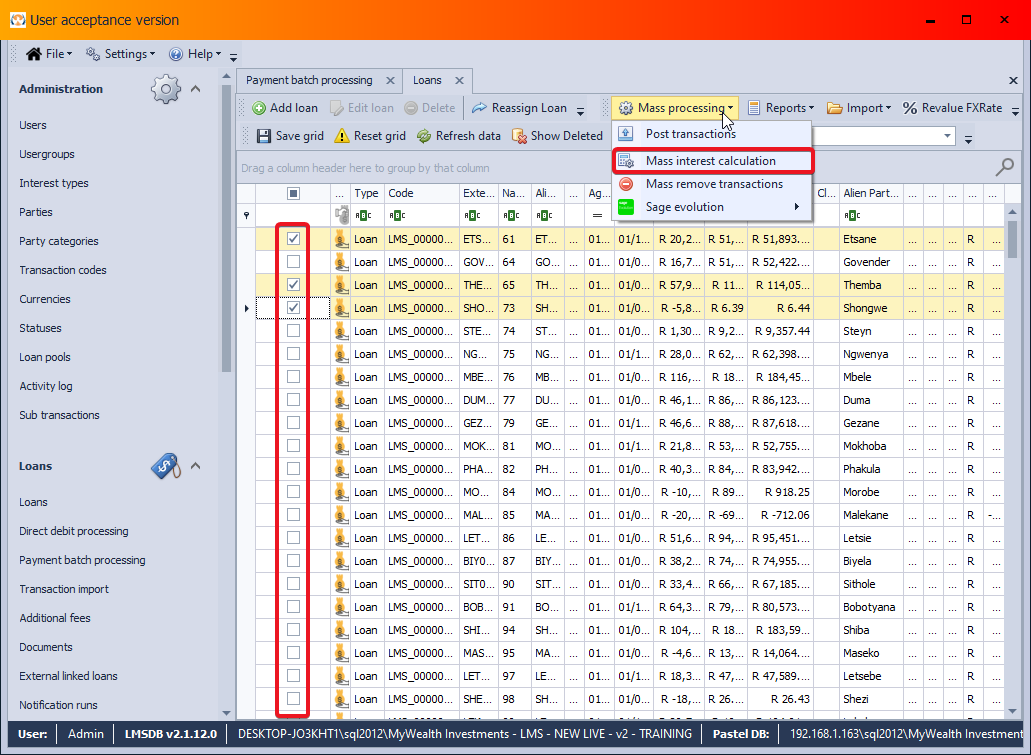
Before processing a payment batch, the interest on the selected loans for the set period is to be calculated. This can be done by selecting the according loans from the loan overview under the “Loans” tab and using the “Mass interest calculation” option under “Mass processing”.
Managing batch payments
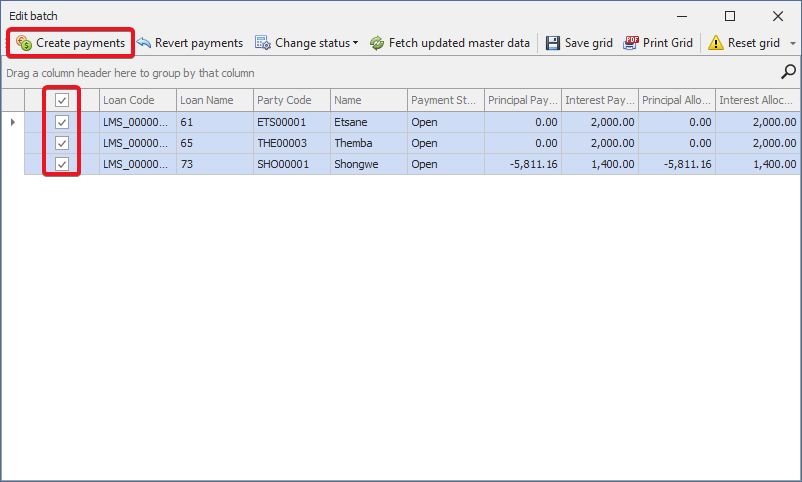
The payment batch transactions can then be processed by opening the according batch, selecting the desired payments (using the checkboxes at the front of each loan) and clicking on the “Create payments” button at the top left corner.
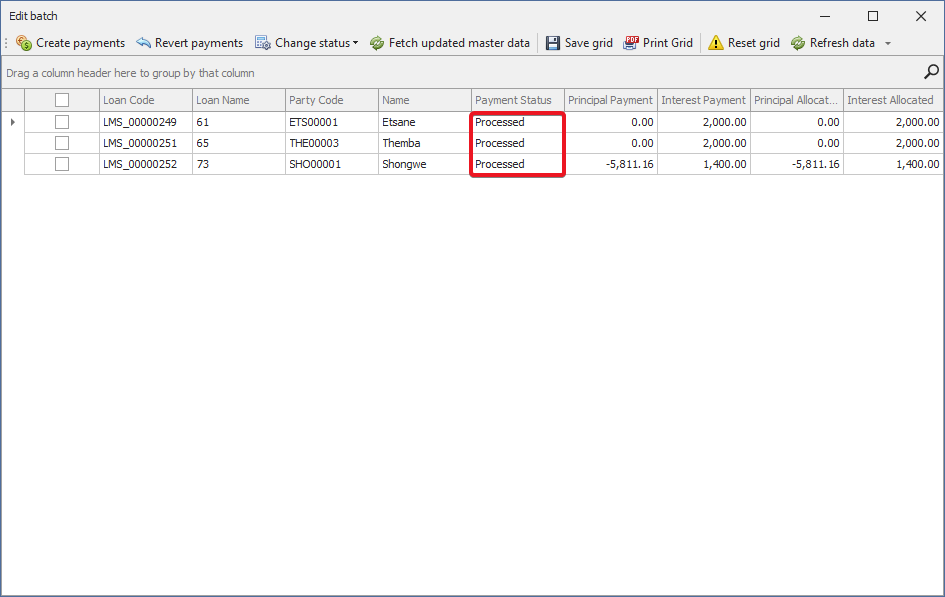
Once created, the payments will be marked as “Processed” in the “Payment status” column.
The processed payments are, accordingly, created as transactions under the corresponding loans.
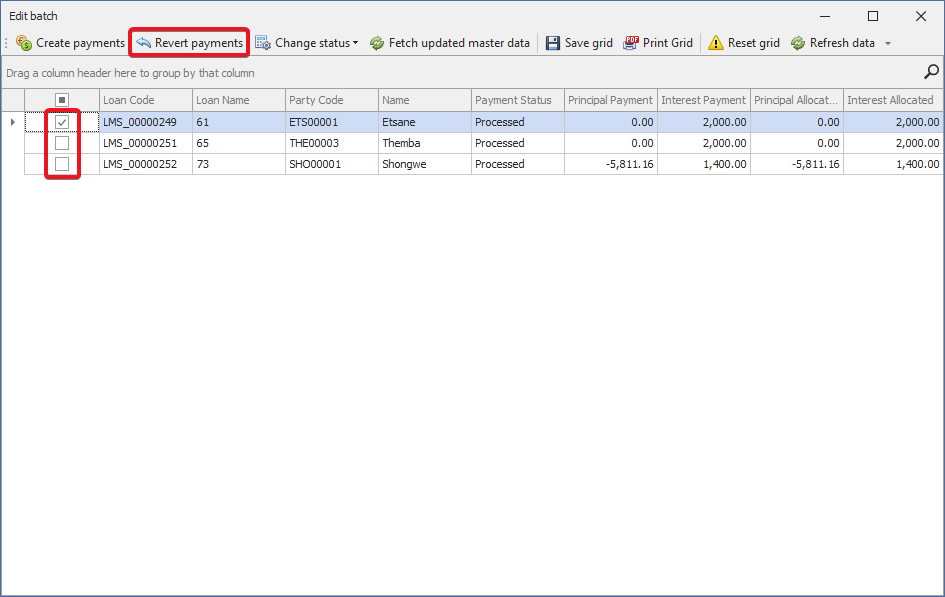
Processed payments can, subsequently, be reverted by selecting the desired payments (using the checkboxes at the front of each loan) and clicking on the “Revert payments” button.
Bank files
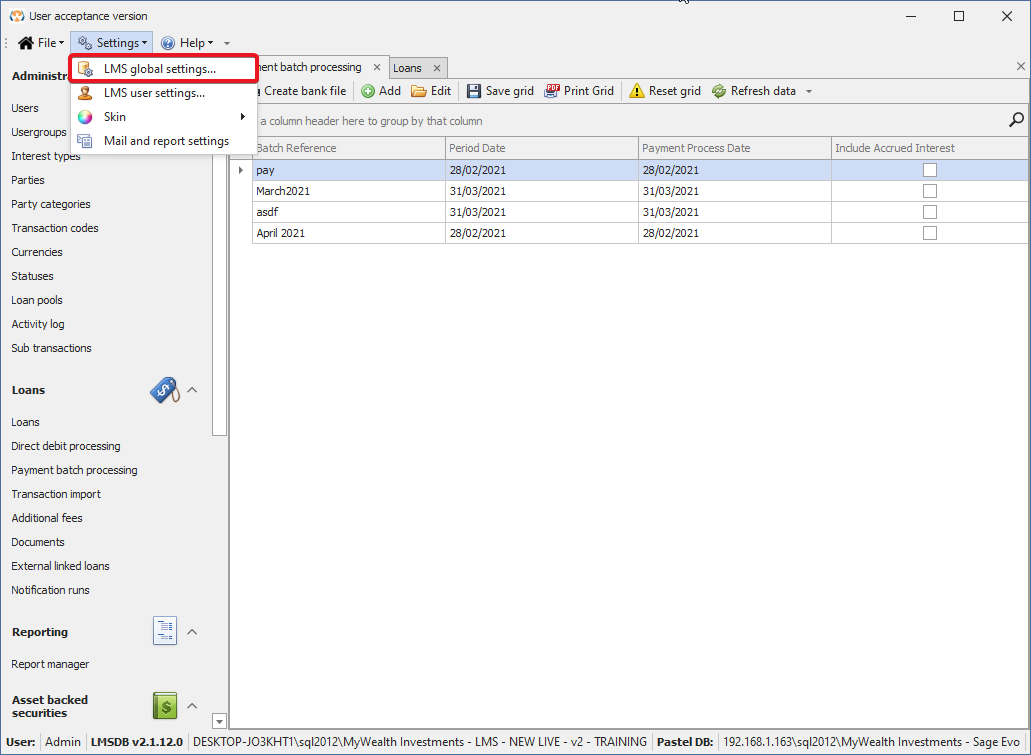
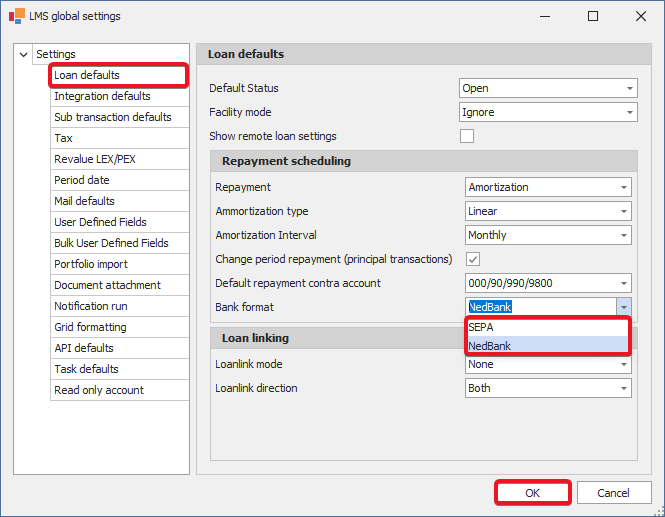
The bank file format can be selected from the “Loan defaults” menu under “LMS global settings”.
Bank files for the batches can then be created by selecting the appropriate batch (by clicking on it) and selecting the “Create bank file” option.
A unique file message ID and collection date are to be saved. The bank file can then be saved, using the “Save file” button.
