This document outlines the steps to import an Accounts Payable (AP) or Accounts Receivable (AR) batch.
- Download the template (link: https://asamcofileshare.blob.core.windows.net/general/Customers%2FAR%20Batch%20import%20template.csv)
- Open Sage Evolution.
- Go to the AR or AP module.
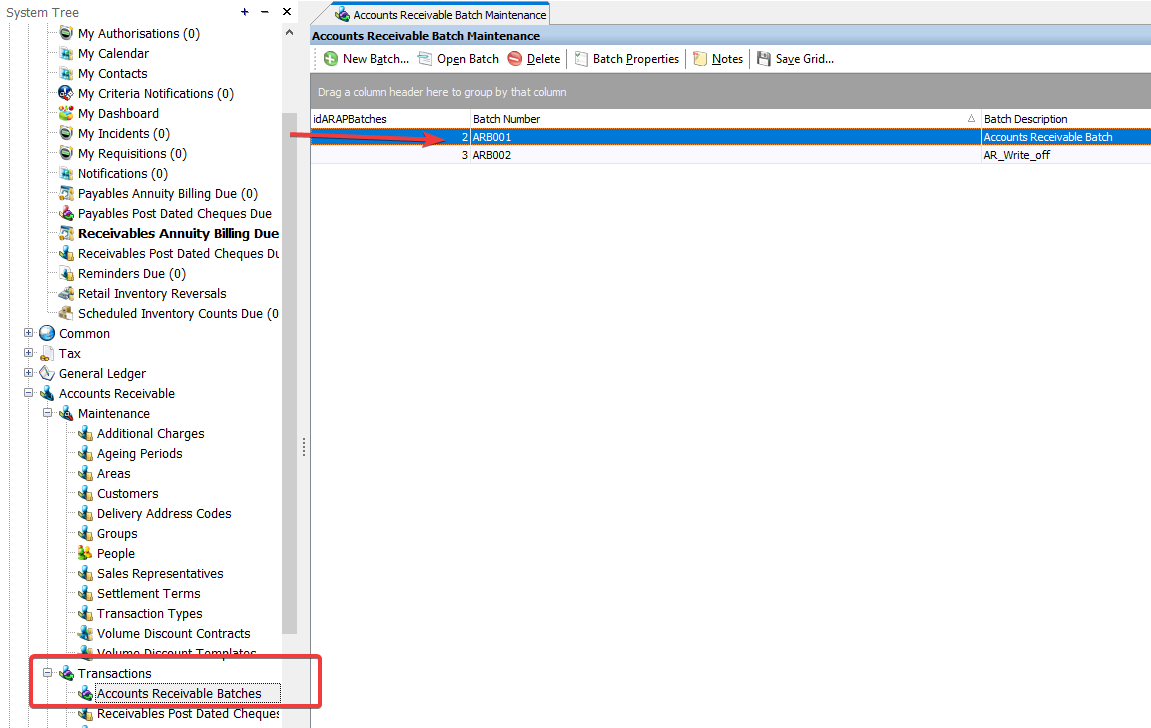
- Transactions
- Accounts Receivable (or Payable) batches
- Open the batch you want to import the lines in.
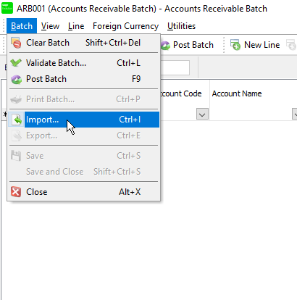
- After opening the batch, click on "Batch" and subsequently on "Import.."
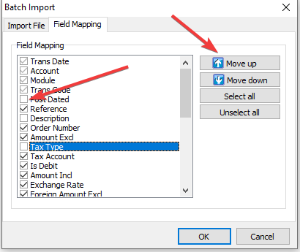
- Go to the second tab ("Field mapping")
- Map the fields in your Excel to the field in this window.
- Use the tick boxes to exclude a field or include a field.
- Use the "Move up" or "Move down" to ensure the right sequence (the sequence of the columns in the Excel MUST MATCH the sequence here)
- After completing the mapping, go back to the first tab ("Import file")
- Check the the following options:
- "Header record" → when you leave the columns headers in the Excel (CSV) file, make sure that this checkbox is ticked.
- "Field delimiter" → make sure that you save your Excel file as (CSV - comma separated values()
- "Date format" → Ensure that the option "Windows Format" is selected.

- Lastly, select the location where you have stored your CSV file to upload.
- Make sure that the Excel file is closed when you want to start uploading.
- Once done uploading, a confirmation message will be shown, optionally you can view the log file.
- Your batch lines will be visible.
