Skip to end of metadata
Go to start of metadata
1. Logging in to Sage Evolution
- Open Sage Evolution.
- Pick the appropriate database from the list. If you are not sure in which database you should be working, ask your manager or contact support@asamco.com. Click on “OK”.
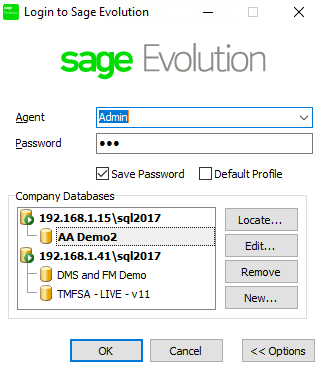
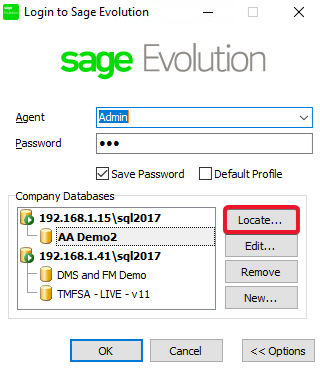
- Select locate in order to locate the desired database on your machine.
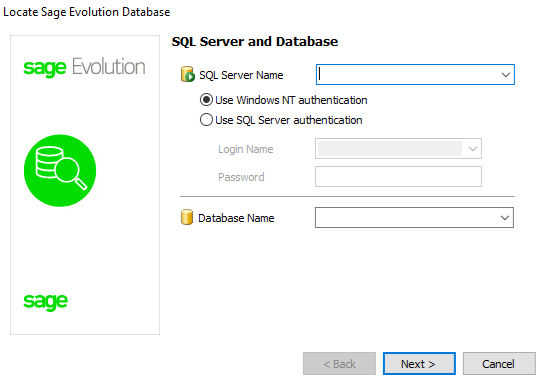
- Fill in all required fields. If you are not sure about the details, ask your manager or contact support@asamco.com.
2. Bill of Material
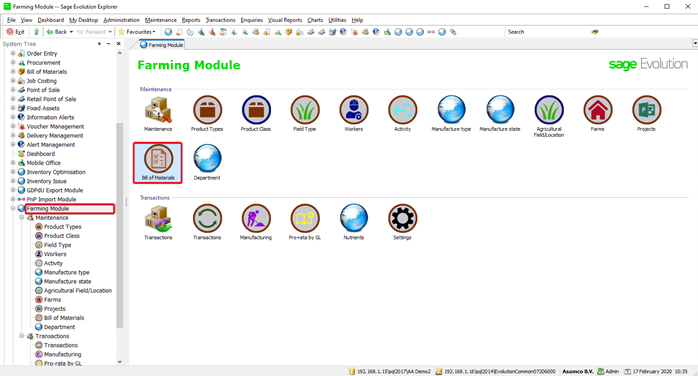
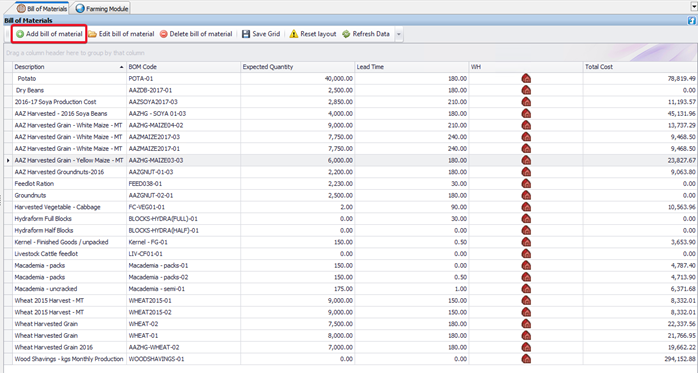
- Click on the “Farming Module” nod on the left tree menu. After, select “Bill of Materials” under “Maintenance”.
- This will lead you to the following window, giving you an overview of the existing bills of materials. These can be edited and/or deleted, using the according buttons on the top of the tab. To register a new bill of materials, select “Add bill of material”.
- The bill of material is to contain all input-output information for the manufacturing process in question.
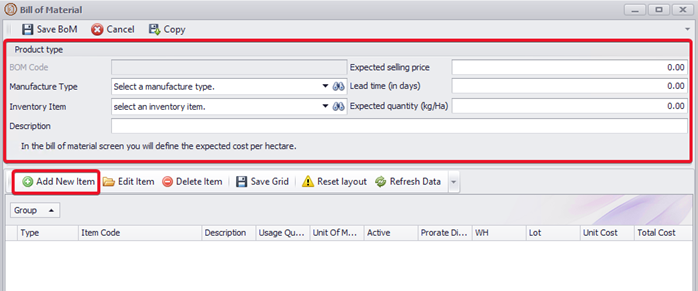
- In the new window you will see the following information fields.
- BOM Code: This field will automatically be filled in by the system with the code, given to the new bill of material.
- Manufacture type: You can select a manufacture type from a pre-set list.
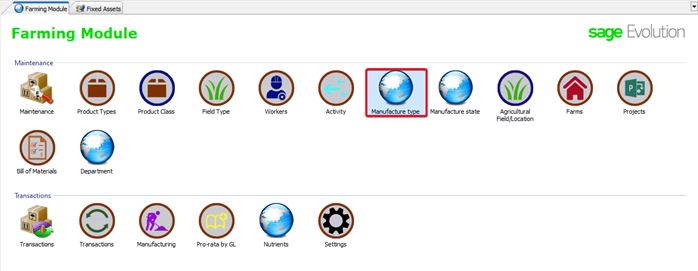
- To add a new manufacture type, click on “Manufacture type” under “Maintenance” (Farming Module >> Maintenance), and then “Add manufacture type”.

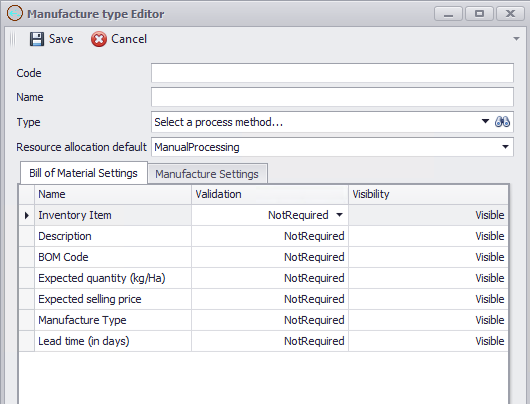
- This will lead you to the following window, where you can set the details of the new manufacture type.
- Inventory item: You can select an inventory item to be manufactured from a pre-set list of inventory items.
- Expected selling price: The expected selling price per unit (of measure).
- Lead time (in days): The expected time (in days) needed to complete the manufacturing process.
- Expected quantity (kg/Ha): The expected quantity to be produced after completing the manufacturing process once.
- To add new items to the bill of material, click on the “Add New Item” button.
- Note: In a newly created bill of material, you are to add all items, involved in the manufacturing process – e.g. all inputs and outputs.
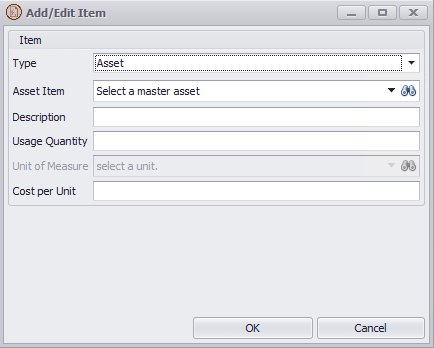
- In the newly opened window, you will see the following fields.
- Type: You can select an item type from the following pre-set list: Inventory/Asset/Implement/GeneralLedger/Labour.
- Asset Item: According to the selected item type, you can select a particular item from the list.
- Description: In this field you can add a short description of the item.
- Usage Quantity: In this field you can fill in the required amount of the particular item to complete one cycle of the manufacturing process.
- Unit of Measure: This field is only available if a unit of measure (e.g. kg) is required for the selected item.
- Cost per Unit: In this field you can fil in the unit (of measure) cost of the selected item.
New asset
- To add new assets, required in the manufacturing processes, select “Fixed Assets” from the left menu tree. After, click on assets.
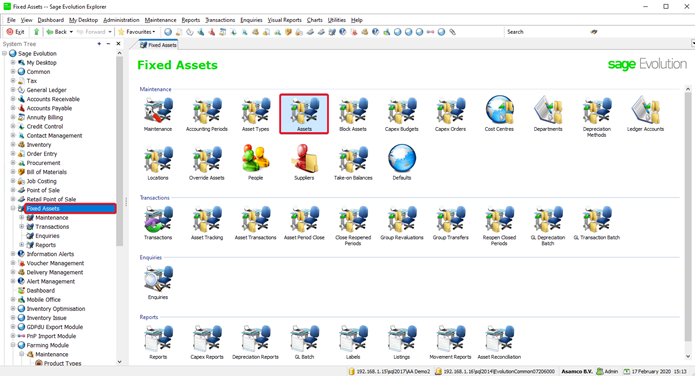
- You will see list of the currently existent assets. To add a new asset, click on the “Add” button.

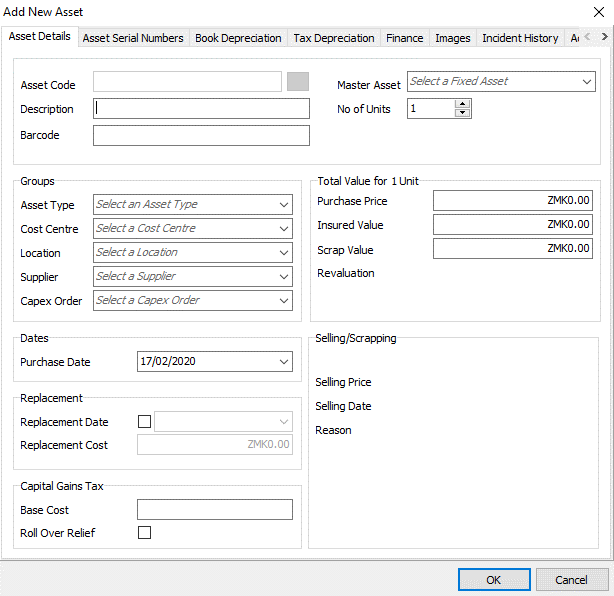
- This will lead you to the following window. From here you can set the details of the new asset to be added. The mandatory fields to be filled in are as follows.
- “Asset Details” tab:
- Description: Add a short description for the new asset.
- Asset Type: Select the type of the asset from the provided list.
- Purchase price: Set the purchase price of the new asset.
- Purchase date: Set the purchase date of the new asset.
- “Book Depreciation” tab:
- Start Date: Set the start date for the book depreciation of the new asset.
- “Tax Depreciation” tab:
- Start Date: Set the start date for the tax depreciation of the new asset.
- “Additional Fields” tab:
- Cost per hour: Set the cost per hour of the new asset’s utilization.
- Master Asset: Yes.
3. Manufacturing
- To start a manufacturing process, click on “Manufacturing” under “Transactions”.
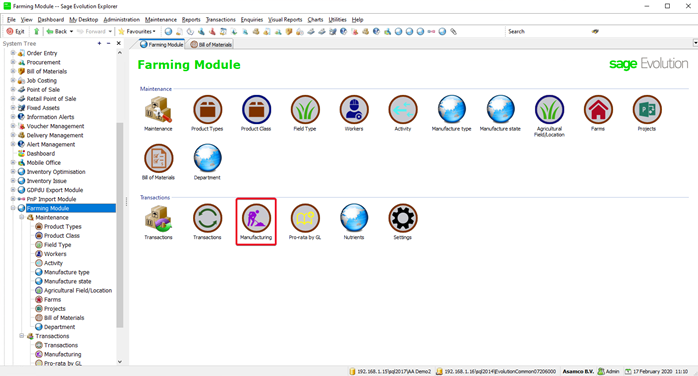
- This will open the following screen. To register a new manufacturing process, click on “Add manufacture”.

- A new window will open, where you need to fill in the following information:
- Bill of Material: Select from the provided list the bill of material to be used in the new manufacturing process (e.g. the newly created bill of material).
- Manufacture type: Select the according manufacture type from the pre-set list.
- General Ledger: Select a GL account to be used.
- Expected quantity: Fill in the expected quantity to be produced.
- WiP Account: Select a GL account to be used as a work-in-pross account.
- Number of hectares (Optional): Fill in the number of hectares of land used.
- Total quantity: Fill in the final quantity produced.
- Description: Add a short description.
- Process Reference: Add a process reference.
- External Reference: Add external reference.
- Warehouse: Select a warehouse from the available list.
- Planting date: Set the planting date.
- Resource allocation mode: Select between ManualProcessing and ProcessFullyAuthorized.
- Project: Select the project of the manufacturing process.
- Field: Fill in a field of the project.
- Start Date: Set the start date for the manufacturing process.
- Projected Completion Date: Set the expected completion date for the manufacturing process.
- Actual Completion Date: Set the date of actually completing the manufacturing process.
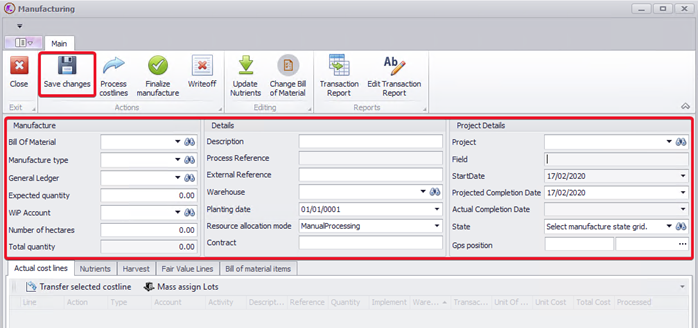
- After filling in all required fields, click on the “Save Changes” button on the top of the window. This will enable you to work on the according tabs under the general information.
- Under the “Bill of material items” tab you can find the list of designated inputs and outputs for the chosen bill of material, together with the total expected cost if the same quantities are used.

- Under the “Actual cost lines” tabs, you can add a new cost line by clicking in the white field. In doing so, you are to fill in the following information:
- Action: Make a choice between DrawResource and ReturnResource, depending on whether the line item is an input or output within the manufacturing process.
- Type: You can select an item type from the following pre-set list: Inventory/Asset/Implement/GeneralLedger/Labour.
- Account: According to the selected item type, you can select a particular item from the accounts list.
- Activity: Select the activity to be performed, using the selected item, from the provided list.
- Description: Add a short description.
- Reference: Add a reference.
- Quantity: Fill in the quantity to be used/produced during the manufacturing process.
- Warehouse: Select a warehouse from the provided list.
- Transaction Date: Set the transaction date.
- Unit of Measure: Select the unit of measure for the selected item (if applicable).
- Unit Cost: Set the price per unit (of measure) for the item to be used/produced.
- Total Cost: This field will be automatically filled in by the system.

- Note: A process can be divided into multiple sub-processes (e.g. when an output of one sub-process is used as an input for another) and these can be managed separately.
- After adding the required cost lines under “Actual cost lines”, open the “Harvest” tab and add the according details.

- Finally, after completing all relevant information, click on the “Finalize manufacture” to finalize the manufacturing process.

- Note: No new bill of material needs to be created the next time the same manufacturing process is to be completed.
{"serverDuration": 166, "requestCorrelationId": "5ff061fbe18b8ae2"}


Add Comment