
EPO – Report manager
User manual
Table of content
Introduction
Glossary
Web application
Dashboard
Report manager
Introduction
This user manual explains the report manager inside the EPO application.
Glossary
Abbreviation | Explanation |
EPO | E-Procurement Online |
RM | Report manager |
The status symbols are as follows:
![]() = EPO module (This button takes you directly into the E-Procurement Online app)
= EPO module (This button takes you directly into the E-Procurement Online app)
![]()
![]() = EPO settings (This button opens the EPO settings)
= EPO settings (This button opens the EPO settings)
= Report manager (This button allows you to email the PDF document report)
![]() = Remove button (This button removes a report template) Please avoid using this button
= Remove button (This button removes a report template) Please avoid using this button
![]() = Edit button (This button allows you to edit the report layouts in EPO)
= Edit button (This button allows you to edit the report layouts in EPO)
Web application
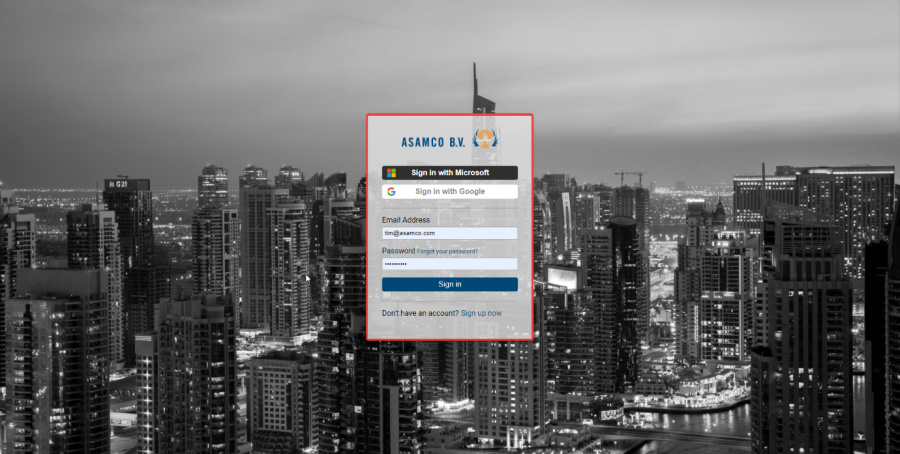
Sign into the Asamco portal using this link: https://asamco-portal.azurewebsites.net/#!/auth/login
You should see the login page displayed as shown below:
Fill in your username and password and you will now be logged into the portal. Note that as the portal is developed the appearance might change slightly.
After logging in please select the relevant organisation you want to work in. For this user manual we will be selecting the RT Systems organisation.

Click on the RT Systems organisation and you will be presented with the companies and the connected applications that are linked to each company.
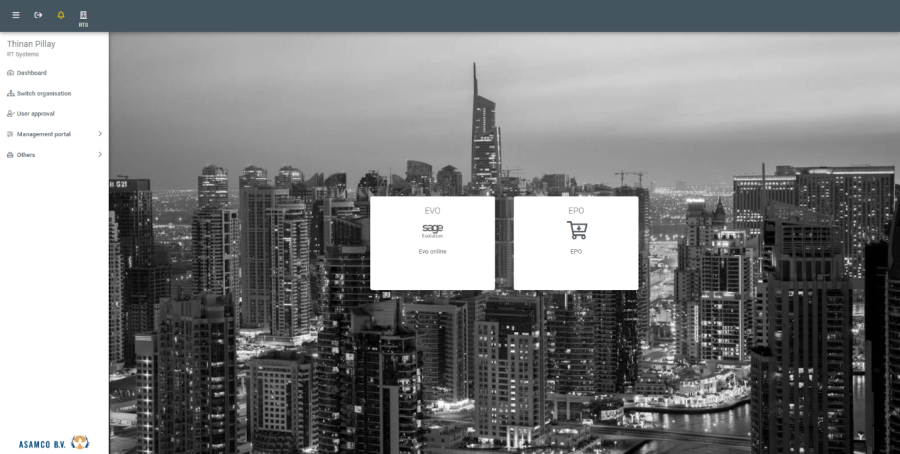
After clicking on the Asamco B.V. company, you will be presented with an overview of all the connected applications linked to that company. The connected applications you can see here are managed by permissions that are assigned by the organisation's administrator.
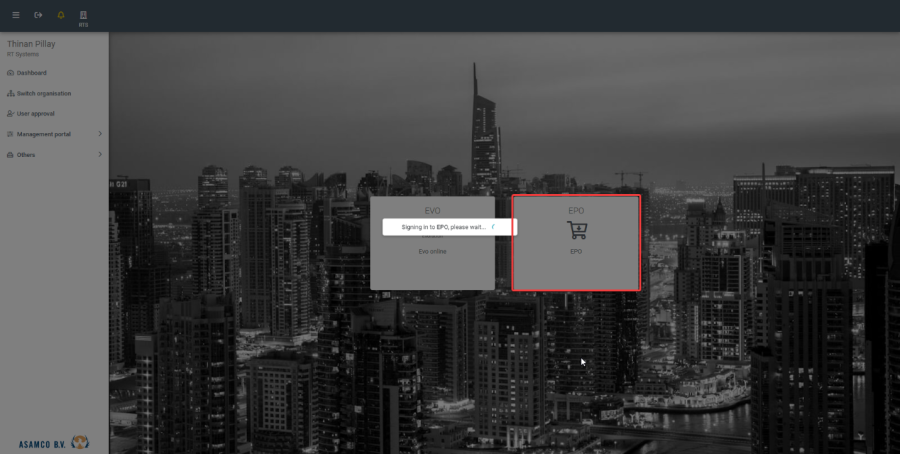
To update a report layout please open the EPO application.
Dashboard
The first screen you will see after logging in is the "Dashboard". Depending on your permissions your menu may not look the same. In order to access the report manager you will need to speak with your company administrator to provide you with the correct permissions to access the report manager.

Report manager
After you have clicked on the report manager, you will then see the following screen displayed, in this screen you can find all the document types in your EPO system.

To export and update a document report layout, find the document you would like to edit/update. In this case we will select the sales order report, next click on the blue pen button on the right side of the screen as shown below:

Once you have clicked on the edit button for the document report you would like to edit the following pop-up screen will be displayed.

To export the current document, fill in the order number of any sales order document which can be found in the history overview screen then click on the export button.

In this case we will use the sales order number: SO113686

Depending on the browser you are using the report layout file will either be downloaded in the bottom left corner or the top right corner as shown here.

The next important step is to make sure you have installed the report designer tool, without this tool you will not be able to update the report layouts. So please follow the steps show below to install and setup the report designer.
Report designer download link:
https://asamcofileshare.blob.core.windows.net/releases/ReportDesigner/latest/ReportDesigner.msi
After you have downloaded the report designer, run the installer as administrator.

Click on the next button, then select the folder where you would like to install the program.
Using the default location is recommended. Click the next button once done.

Finally click next to complete the setup.

Once the setup has completed, double click on the report layout you have downloaded from the report manager.

You will then see the report layout designer where you can make all relevant changes to the report.

On the right side of your screen you will see the field list which allows you to show certain information in the document report.

Using these fields you can add in any information the report, the company entity field can used to fetch data about the company that is sending out the invoices, the data source table uses the _rtblagents table same as in your Sage all the info from these fields come directly from your Sage system.
The views menu allows you to add in any additional windows including the report explorer and report field list.
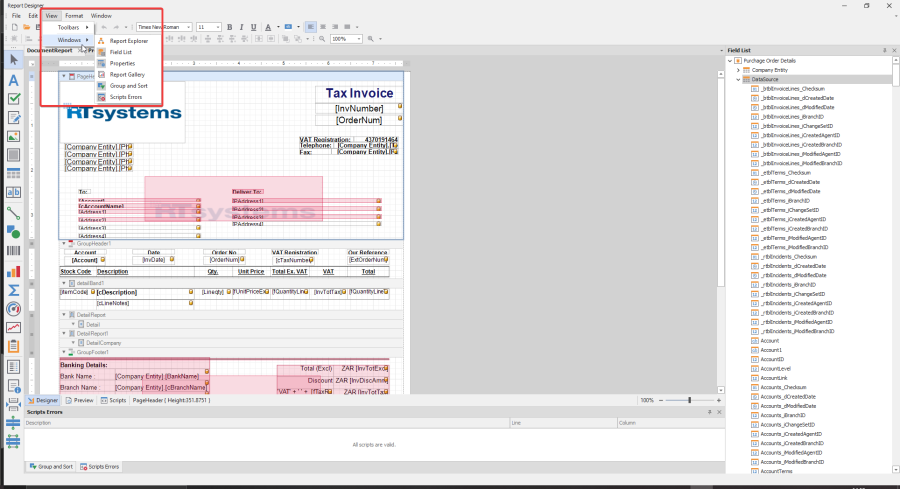
To update or edit any field in the report simply click on the small arrow on the top right of each fields block.

You will then see the 2 important cell tasks, text, and expression.
Text format can be used to hardcode the text into the report and does not fetch any fields from the Sage database. Expression used fields that are fetched directly from your Sage database.
The format string can be used when dealing with date, time, currency, and other values that need a specific format for the report.
This allows you to choose between various categories and you can also set custom values for each field in the report.

Should you have any difficulty with the instructions on this guide please contact support@asamco.com and we will assist you with any questions you may have.