Skip to end of metadata
Go to start of metadata
Default screen
- After logging in you will, by default, see the following screen.
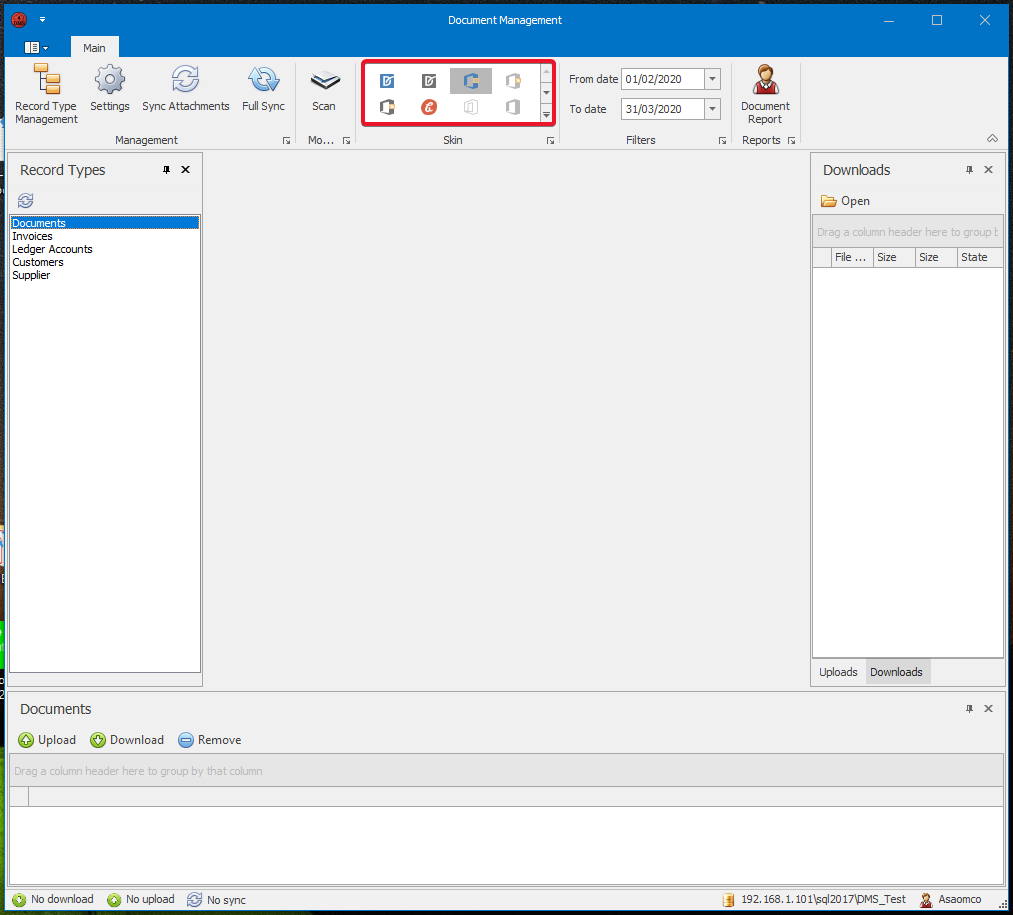
- You can choose the theme of the program by selecting a theme from the “Skin” box.
Record types
- You can manage the record types available by clicking on the “Record Type Management” button in the upper left corner of the window.

- This will lead you to the following window.
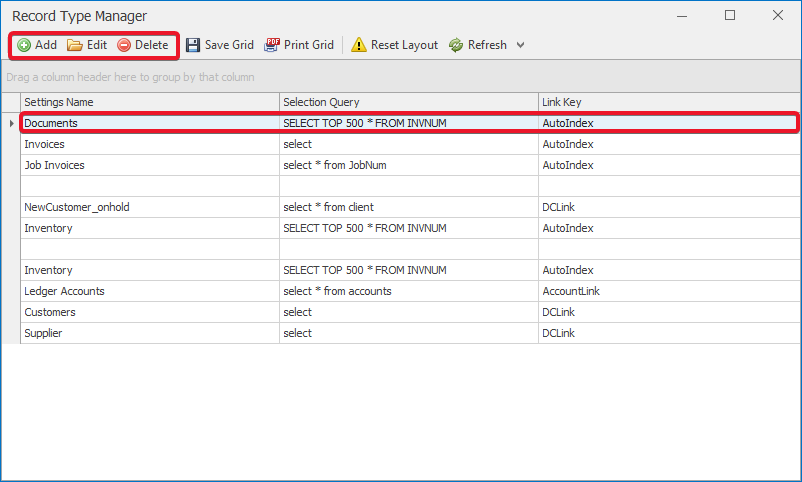
- You can edit or delete existent record types y clicking on the according record type and then using the “Edit” and/or “Delete” buttons in the upper left corner. Further, you can add new record types, using the “Add” button.
- When adding new and/or editing existing record types, the following fields are to be filled in:
- Record type name
- Active (Yes/No)
- Key
- Query
- Default date filter column
- Visible columns
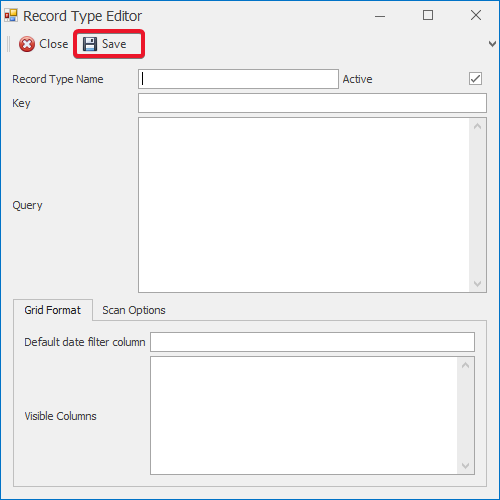
- The information can then be saved by clicking on the “Save” button in the upper left corner.
Synchronization of attachments
- Already existent attachments can be synchronized, using the “Sync Attachments” and “Full Sync” buttons.

Scanning of documents
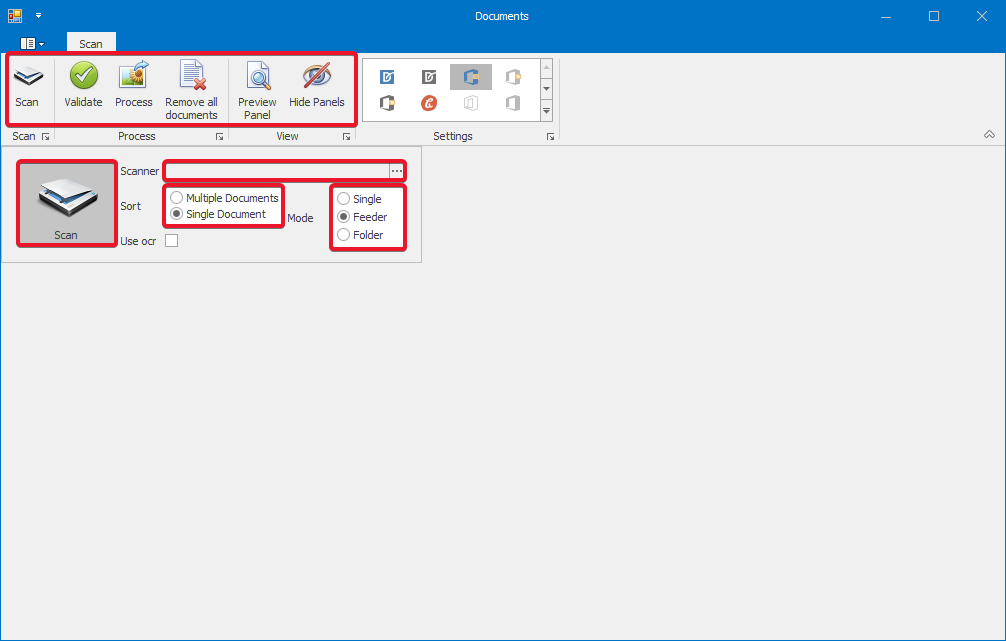
- Documents can be scanned directly through the application, using the “Scan” button.

- This will open the following window. The scanning settings can be adjusted by first clicking on the “Scan” button on the menu grid. After all appropriate options have been selected, you can scan, using the “Scan” button. After, the scanned file(s) can be validated, processed, previewed and/or removed, using the according buttons on the menu grid.
Filtering of documents
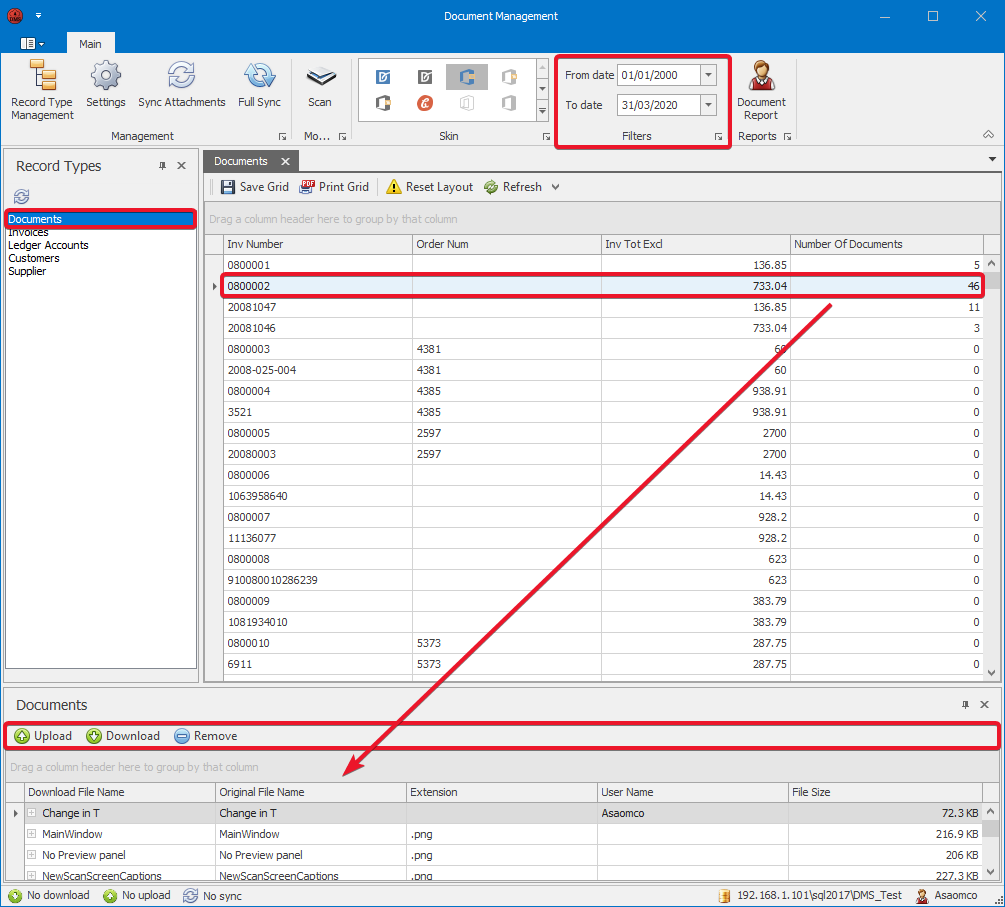
- Documents can be filtered by date by first selecting the appropriate date range in the “Filters” box on the menu grid. After, the desired record type needs to be selected from the list under “Record Types” on the left.
- This will open a tab (e.g. “Documents”) in the center of the window, where a list of all records from the according record type and selected dates is displayed.
- On the right of each document record is the number of documents attached. You can select the desired record and click on it. This will display the list with the attached documents at the bottom of the window.
- You can upload new documents to the record, using the “Upload” button. Existing documents can be downloaded and/or removed, by selecting the appropriate document and then clicking on the “Download” and/or “Remove” buttons.
Document report
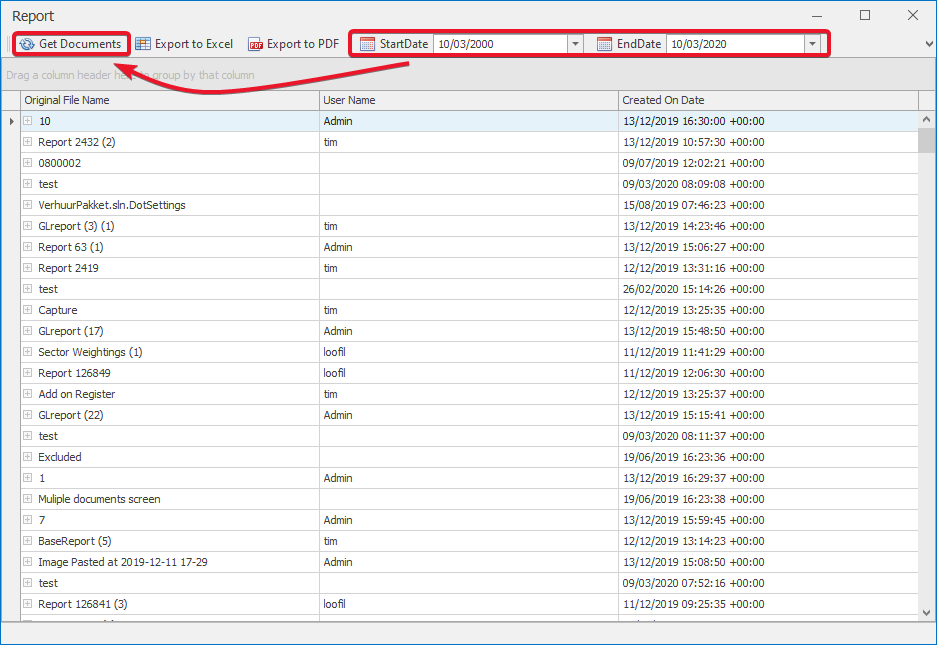
- The document reports can be accessed, using the “Document Report” button on the menu grid.

- Here again, appropriate filter dates can be selected. The list of documents will then be displayed after you click on “Get Documents”. The list can be exported to both Excel and PDF, using the appropriate buttons on the grid.
{"serverDuration": 85, "requestCorrelationId": "696bc708985acfb2"}


Add Comment