Skip to end of metadata
Go to start of metadata
New notification run
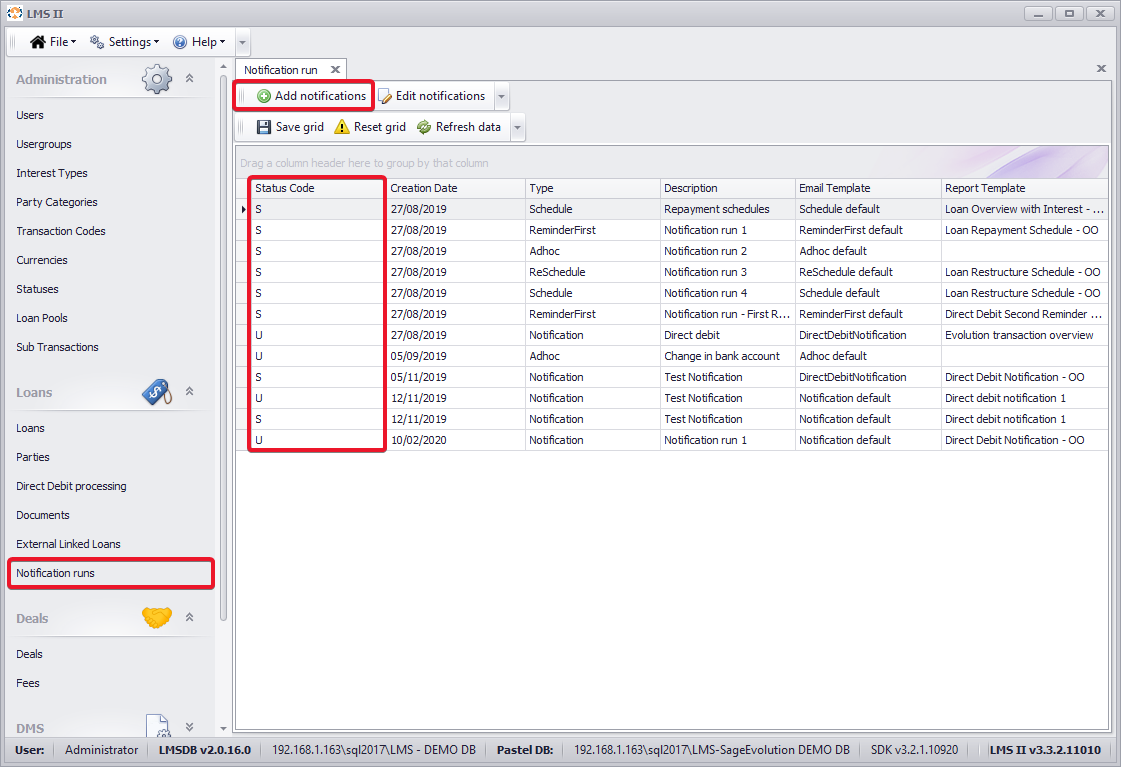
- To manage your notification runs, select “Notification runs” from the left menu tree. By default, you will see a list of all previously created notification runs. At the front of each notification is its status – S (sent) or U (unsent). To add new notification runs click on the “Add notifications” button (see image below).
- You will see the following window. Before saving the notification, you need to fill in the following information:
- Description
- Notification type: Schedule/Notification/ReminderFirst/ReminderSecond/ReSchedule/Tasklist/Adhoc
- Email template (From a pre-set list)
- Report template (From a pre-set list)
- After filling in the according fields, click on “Get loans”, to be able to see the list of loans to which you can apply the current notification.
- Filters can be applied for the loans to be chosen from. After applying the desired filters, the list of loans is displayed, using the “Get loans” button. If no filters are applied, all loans within the database are displayed.
- Select the loans you want to include in the notification run by ticking the checkboxes in front of these.
- Click on “OK” to save the notification.
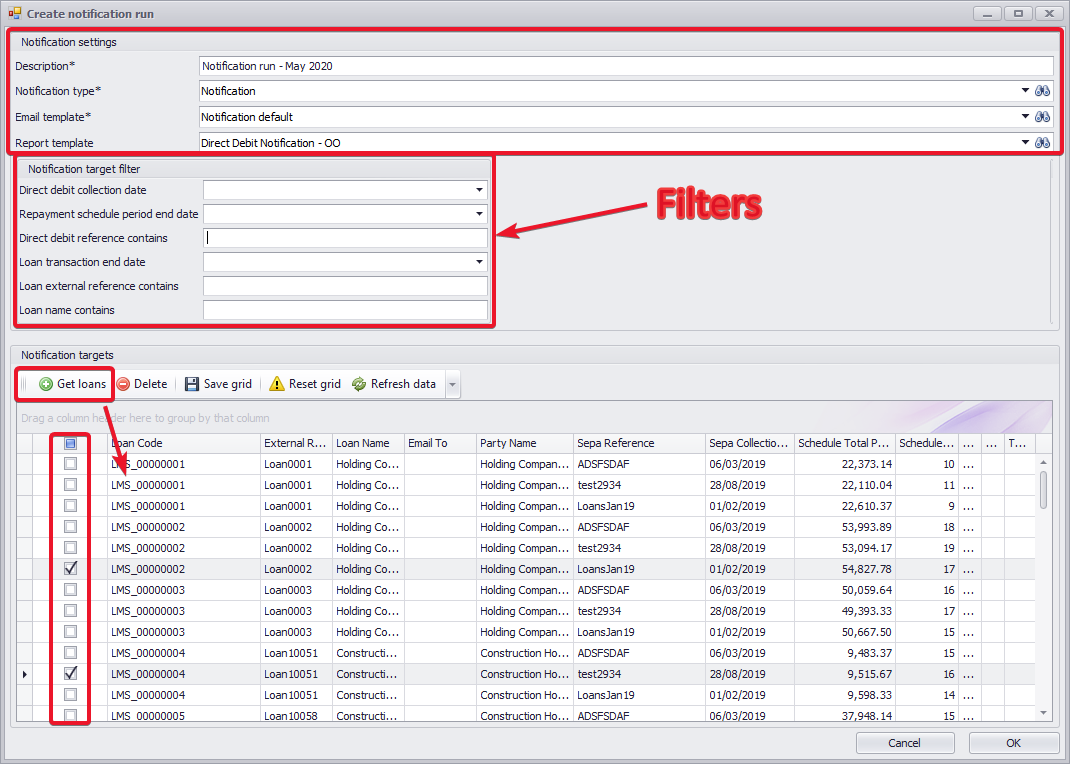
Notification setup
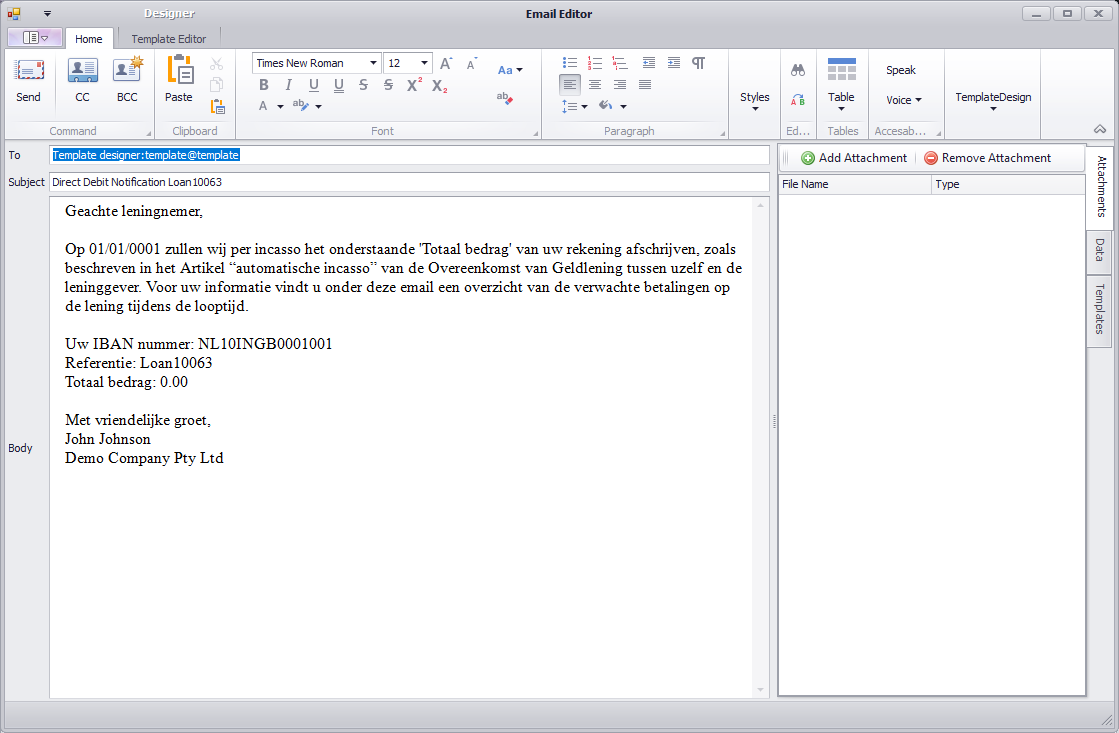
- The email and report templates to be used can be adjusted, using the “Edit” button, available per field.

- This will open the following window through which you can make adjustments to the set template. The changes will further be saved for the future uses of the template.
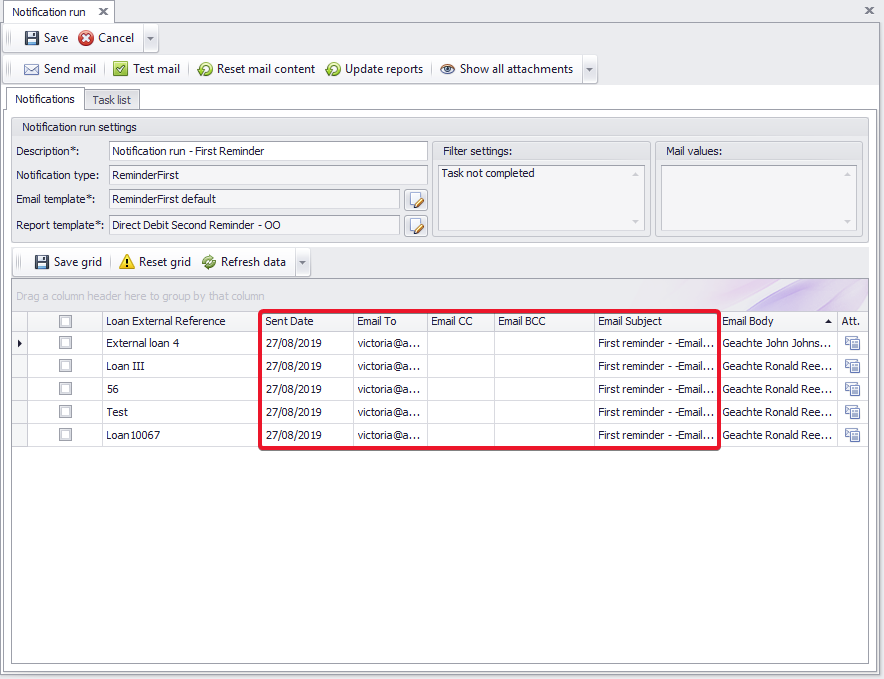
- After creating the new notification, you will see the following window (see image below). From there you can set the sending date, the receiver email, CC and BCC emails, and the email subject per loan.
- The email body follows the selected notification template. You can, however, make adjustments per loan to the body by clicking on it. This will open an additional window through which you can make the desired edits (see below).

- By default, LMS will add the according attachments, depending on the chosen notification template. You can see the default attachments and add/remove attachments per loan according to your needs. You can do so by clicking on the “Attachments” button for the desired loan (see image below).

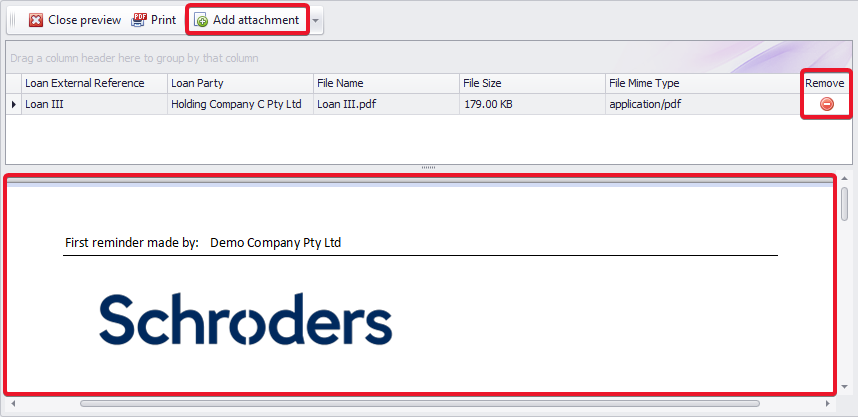
- This will lead you to an attachment overview. Attachments are added and/or removed, using the according buttons (see below).
Task lists
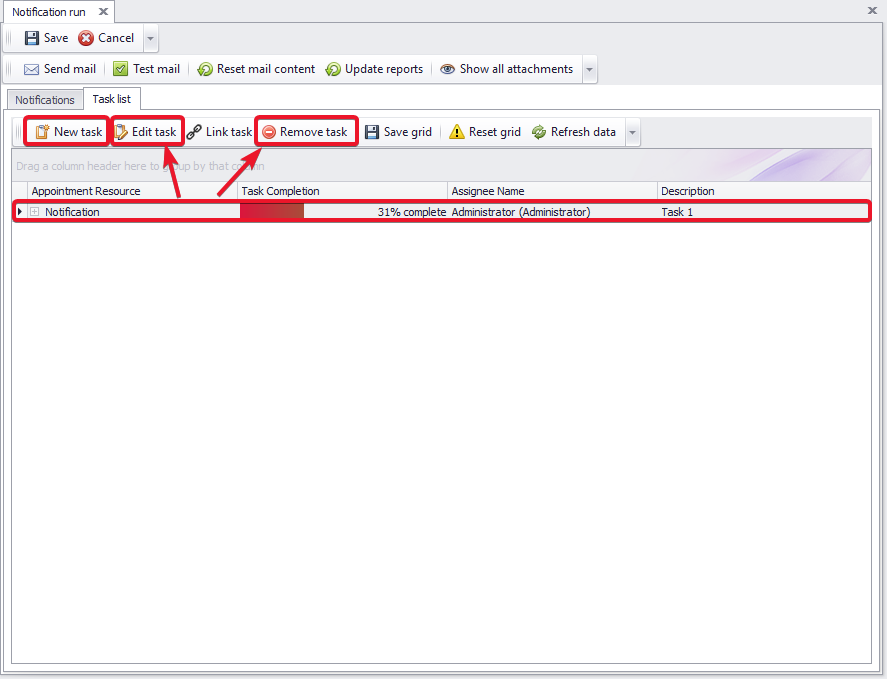
- You can manage the notification’s task lists in the “Task list” tab. A list of the existent tasks (if any) will be displayed below.
- You can edit and/or remove existing task lists by selecting the according task and using the “Edit task” and/or “Remove task” buttons.
- You can add task lists to the created notification by opening the “Task list” tab and clicking on the “New task” button (see below).
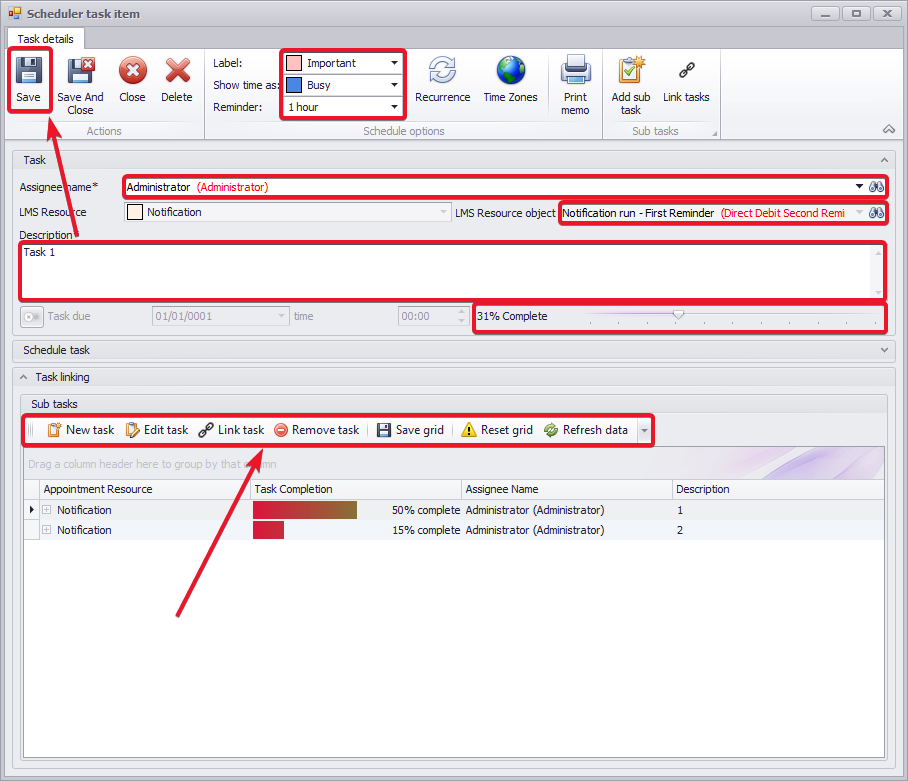
- This will lead you to the following window. There you can fill in the following details about the new task:
- Label: Important/Business/Personal/Vacation/Must Attend/Travel Required/Needs Preparation/Phone Call
- Show time as: Free/Tentative/Busy/Out of Office/Working Elsewhere
- Reminder: You can set in how much time you would like to receive a reminder about the task
- Assignee name
- LMS resource
- LMS resource object
- Level of completion (in %)
- You can further add sub-tasks within a task. The same information is to be filled in per sub-task.
Sending notifications
- After adjusting the required information, you can send the notification. You can choose for which loans you want to send a notification by ticking the checkboxes in front of each loan. After selecting the according loans, you can either test the email, using the “Test mail” button, or send the notification directly, using the “Send mail” button.
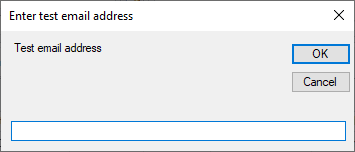
- Testing the mail will give you the option to fill in an email (e.g. yours) to send the notification to (see on the right), allowing you to see the actual email notification that is to be further sent.

{"serverDuration": 75, "requestCorrelationId": "f9775dd2f72a7515"}


Add Comment